How to Register or Troubleshoot a ProConnect NVR on AvertX Connect
A ProConnect NVR must be registered to the AvertX Connect cloud connectivity service before user accounts can access it remotely. AvertX Connect is the name of the service used to remotely access AvertX network video recorders (NVR), manage cloud-based user accounts, and store select video clips exported from the NVR. It also facilitates communication between the NVR(s) and mobile apps.
Do the following to register or troubleshoot an NVR on AvertX Connect:
1. Create an AvertX Connect account or confirm an existing account (with administrator permissions) can log into the AvertX Connect cloud service from a computer web browser.
2. After validating the AvertX Connect account, log into the cloud service and select the icon of a cog wheel on the top right of the screen, below the email name.
3. In the AvertX Connect > Settings > Account Profile menu, scroll down near the bottom of the screen
4. At the bottom of the AvertX Connect Account Profile screen you will see "Recorder Registration Code". Copy this code to add/register the ProConnect NVR to your newly created Avertx Connect account.
5. Check that the ProConnect NVR is powered on and physically connected to the local network.
6. Log directly into the NVR console with the local admin account from the initial setup. This is not the AvertX Connect account from step 1 of this article. If the NVR's local admin account isn't working or the password has been forgotten, refer to this admin account and system recovery article.
7. Log into the console of the NVR unit with the local admin account and use this Network Diagnostics article to confirm network connectivity.
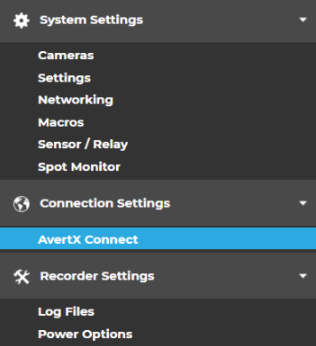
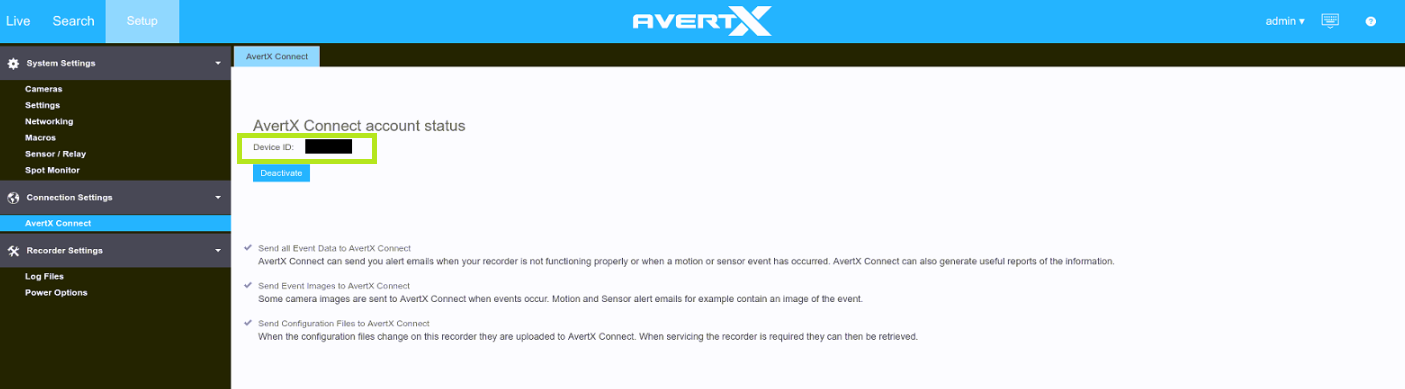
8. Go to to the NVR's Setup > Connection Settings > AvertX Connect menu.
9. Enter the credentials of an AvertX Connect verified user account (from step 1) or the copied registration code (from step 3). You can also change the name of the recorder here before clicking on the "Connect" button. Click Connect.

10. When the NVR is registered to the AvertX Connect service, it'll show a unique Device ID. The screen will also show a "Deactivate" button, meaning the system is connected to your account:
11. Go to AvertX Connect (webpage may need to be refreshed) to see the NVR reflected under the Recorders tab.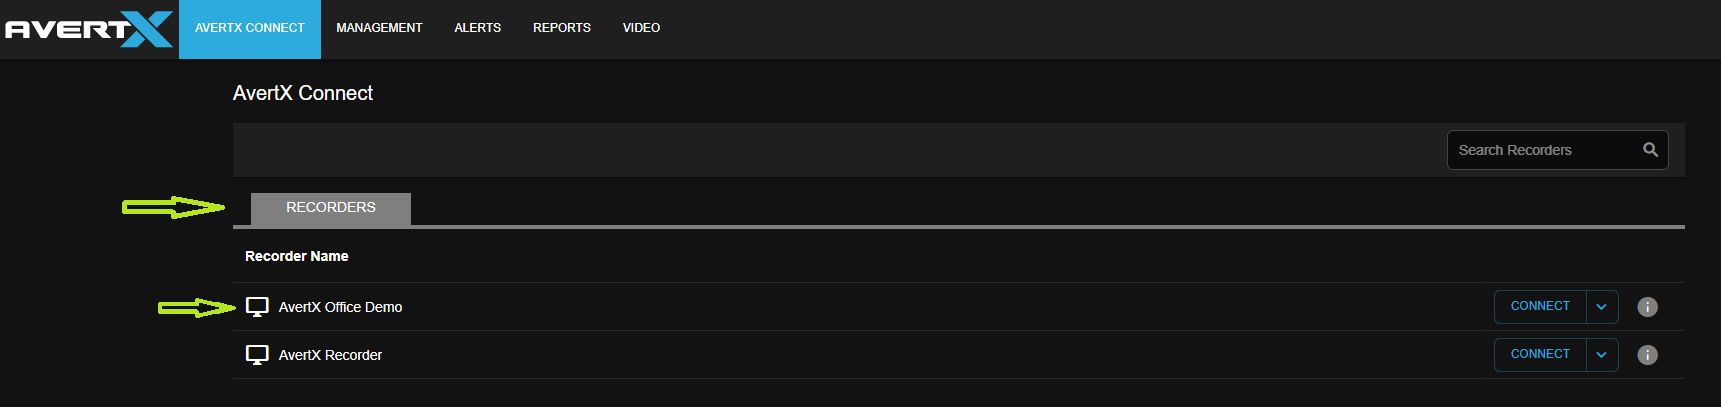
12. If the recorder shows OFFLINE, instead of CONNECT on AvertX Connect, repeat steps 1-9 above. Then click on the Deactivate button below the Device ID, and repeat step 6-9 to re-register the NVR.

