How to Add Multiple Cameras to a ProConnect External Switch
Before getting started refer to the linked article to setup an external POE switch on a ProConnect A800(+) or ProConnect A1600(+) NVR, if it hasn't been done yet.
The following process is for adding cameras that have not already been configured on an AvertX ProConnect recorder. If you have already added AvertX cameras to an NVR's built-in POE, the camera may need to be reset beforehand.
Adding multiple cameras to an external POE switch
Note: This process requires the DHCP utility which is only in 2.2.3.4 and higher software versions.
- Lay the cameras out near the POE switch and connect each of them to a numbered POE port on the switch.
- Log into the NVR console, not from a computer web browser.
- Click the setup button at the top (this must be done using the keyboard, mouse and monitor connected directly to the ProConnect).
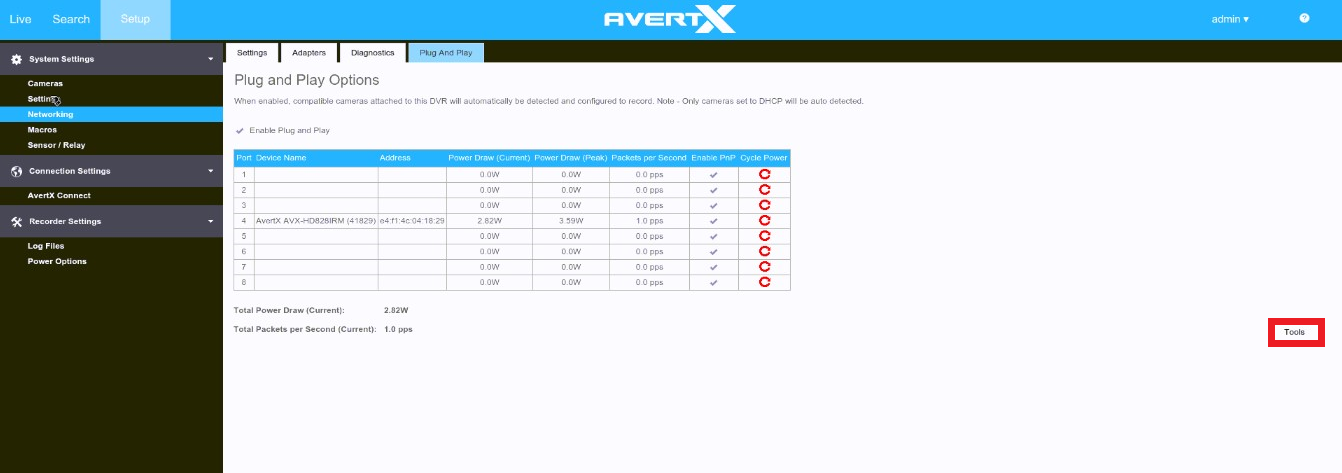
- Click "Networking" on the side menu
- Click on the "Plug And Play" tab
- Click the Tools button on the right
7. Double click the DHCP Service utility icon on the desktop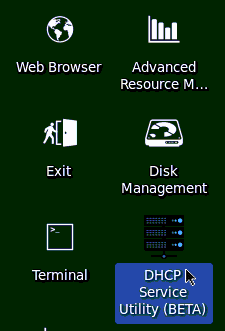
8. Click Activate service
9. Double-click the Network Camera Manager (NCM) utility tool icon on the desktop.
10. Check the "ONVIF Detection" box and click Refresh
11. Select all cameras by checking the box next to each camera. (It should show all your cameras, each one with a different ip starting with 192.168.51.11).
12. Click System and then type in your desired password in the new password and verify password fields (must be at least 9 characters long and include a lowercase and uppercase letter, a number, and a special character).
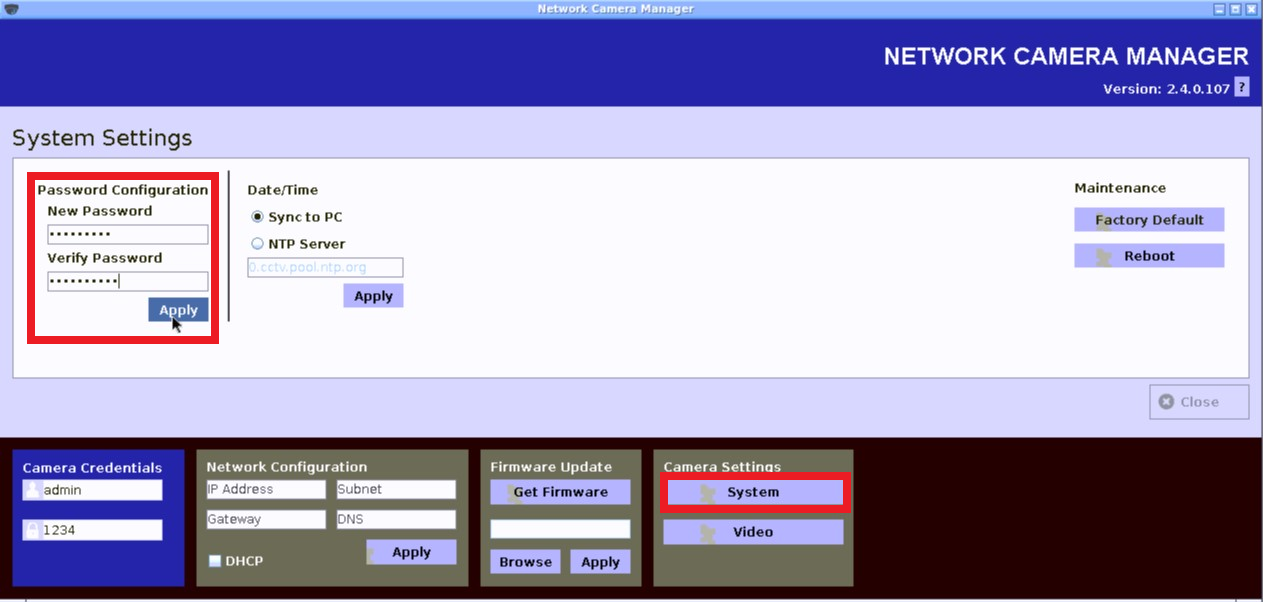
13. Click "Apply" (under verify password)
14. Click "Close" button on right-hand side of Network Camera Manager.
15. Update the password under camera credentials in the lower left corner of Network Camera Manager
16. Fill in IP address, subnet, gateway and DNS fields under the network configuration section.
-- IP address = 192.168.51.11 (each camera must have a unique IP) I.E - 192.168.51.11 - 192.168.51.254
-- Subnet = 255.255.255.0 (will remain the same for all cameras)
-- Gateway = 192.168.51.1 (will remain the same for all cameras)
-- DNS = 8.8.8.8 (will remain the same for all cameras)
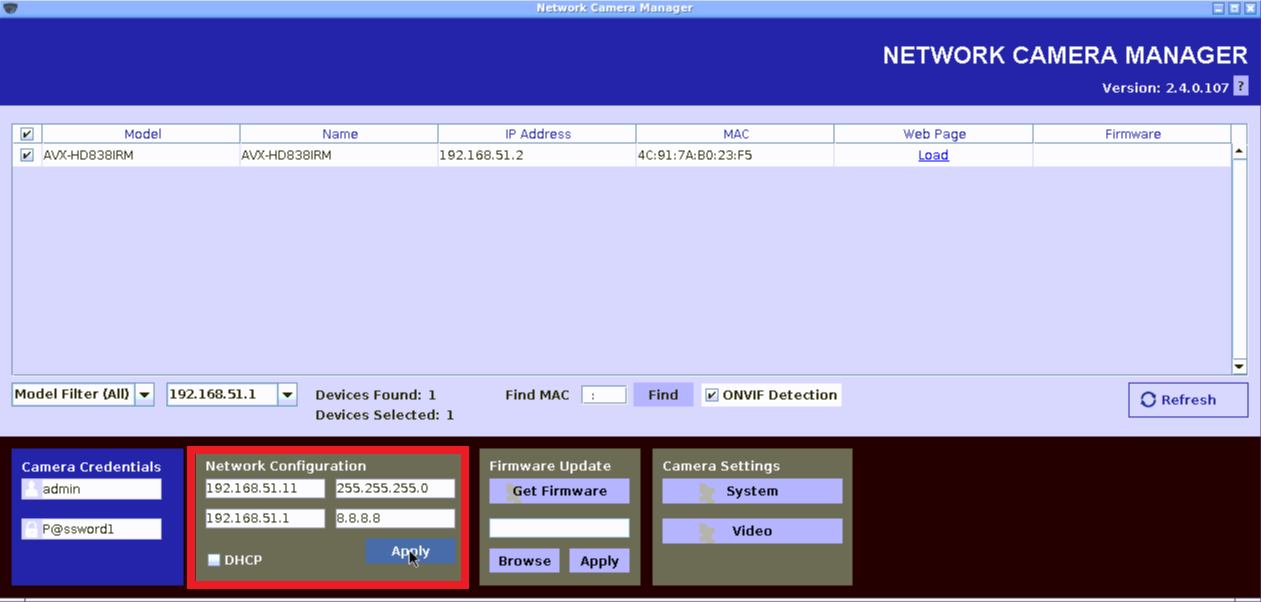
17. Click Apply under network configuration section. (Note: NCM will automatically set 192.168.51.11 for the first, 192.168.51.12 for the next, 51.13 for the 3rd and so on for all cameras checked.)
18. Close the Network Camera Manager and the DHCP Utility tools.
19. Double-click the "Exit" icon on the desktop
20. Log back into the recorder if needed and go to Setup > System Settings > Cameras
21. Click the "Add Cameras" button on the cameras page in the setup menu.
22. Select your cameras from the list
23. Fill in username (by default it's admin) and 1234 or the password you set on step 12 for the camera(s). The red lock symbol on the far right should turn into a green check indicating the username and password is correct.
24. Click "Add Selected Cameras" in the lower right corner.
25. Reconnect any cameras that were unplugged from the built-in POE on step 1.

