How do I Import and Export a Configuration File on a ProConnect Recorder?
An AvertX Connect Configuration File has configuration settings for your ProConnect recorder. It can be used with a Recovery, Reimage, or when replacing a ProConnect NVR. The Configuration file can save time getting the recorder back up and running in minimal time.
Performing an Export of the Configuration File
- Select the Setup > System Settings > Settings in the menu on the left.
- Under Settings you will see the following:

3. There two Export options:
- Export is used if you are going to save the configuration file to a computer folder or a USB drive
- Export to Avertx Connect is used to push the configuration file to your AvertX Connect account.
- NOTE: To locate and download the file exported to the AvertX Connect cloud service, use this article.
Depending on the situation you are working with will determine which Export method you may prefer to use.
Performing an Import of the Configuration File
- Ensure the ProConnect NVR is registered to AvertX Connect.
- Log in with the AvertX Connect account.
- Select the Setup > System Settings > Settings in the menu on the left.
- Under Settings you will see the following:
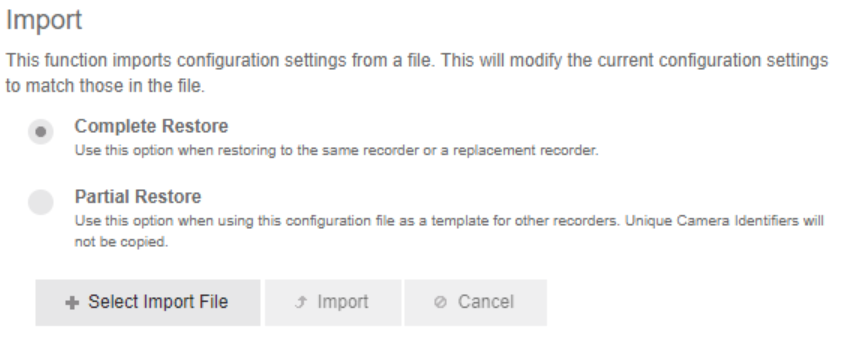
3. Click the Select Import File button to bring up a drop down menu if you are working from your workstation or it will bring up a USB if you have put your Configuration File on a USB.
4. You will need to navigate to the location of the Configuration File, either on your workstation or if it was placed on a USB you will want to select from there.
5. Once the file is displayed below the Import you can select Import.
Once the Configuration File is Imported, it may take several minutes to the file to reconfigure the NVR. Once completed it will take you back to the Login screen.
NOTE: The admin password that was previously used on the recorder will need to be used to Login.

