How Do I Configure The HD838 To Record Analytics Events To The Micro-SD card
Before starting, confirm that the date in the camera's administrative user interface (UI) is accurate.
Check the "Sync with computer time" box, even if it’s already synced: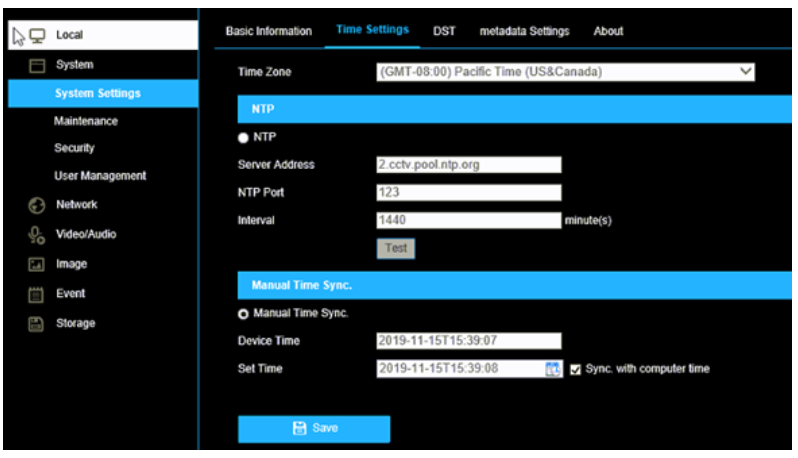
Setup Analytics
- Setup the Maximum (Max) and Minimum (Min) Detection Area zone and make sure Intrusion Detection is Enabled.
- The detection area zones (yellow boxes) are numbered:
#1# is for Person Detection
#2# is for Vehicle Detection

Adjusting Person and Vehicle Detection
Step 1: Choose Person or Vehicle Analytic Regions
The local camera setup menu will load to the Analytics tab by default. Select Person or Vehicle Detection to adjust the respective detection settings for each zone.
Step 2: Set Detection Area
Detection area defines the area or zone in an image where Smart Analytics will be performed. Modifying this area can exclude parts of the scene you do not want to trigger a detection event. To adjust the detection area, click a corner point and drag to the new position.
To create a detection area:
- Click on Detection Area.
- Click on the image to set the first point of the detection area.
- Move to the next point and click to set. Repeat to complete the shape.
Step 3: Set Minimum and Maximum Size
Detection boxes are used to set the minimum and maximum sizes of objects you would like to detect using Smart Analytics in the image. To adjust the Min/Max size, click a corner point and drag to the new position.
Minimum Size
To create a Minimum (Min) Size detection box:
- Click on Min Size.
- Click and drag a box representing a person or vehicle at the furthest distance from the camera to detect.
Maximum Size
To create a Maximum (Max) Size detection box:
- Click on Max Size.
- Click and drag a box representing a person or vehicle at the closest distance from the camera to detect.
Step 4: Set Threshold
[Range 0-10 sec] Threshold is the amount of time, in seconds, a person or vehicle must be detected in the detection area to trigger an event. For example, if threshold is set to 2, an event is triggered when a person or vehicle has been detected for 2 seconds.
TIP: AvertX recommends a threshold of 0-1 for most scenes.
Step 5: Set Sensitivity
Range [1-100] The value of the sensitivity defines how sensitive the system is to objects which can trigger events.
- Setting the sensitivity too high can result in increased false alerts.
- Setting the sensitivity too low can result in missed events.
NOTE: A sensitivity range of 85 to 95 for Person and Vehicle Detection zones is accurate in most scenes.
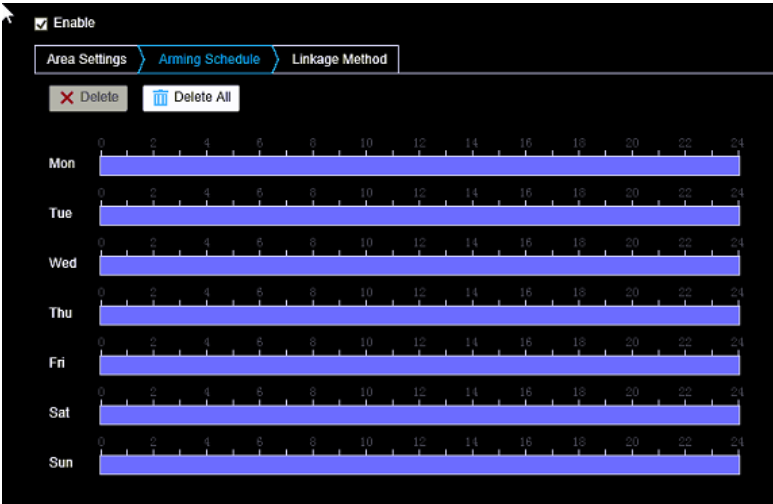
- Make sure the day/time settings in the Arming Schedule is correct:
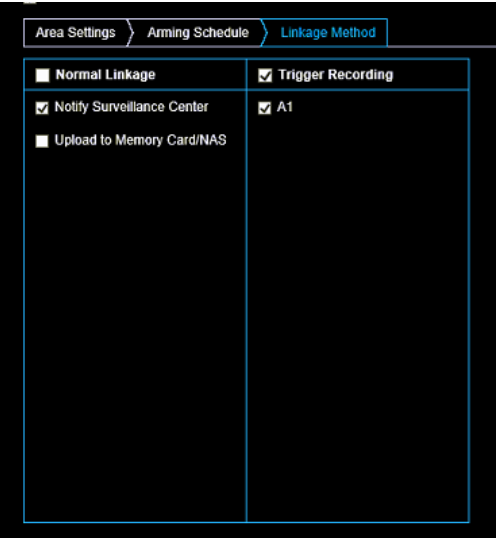
2. Setup Linkage Method:
Notify Surveillance Center = Send Analytics Event Data to the recorder
Upload to Memory Card/NAS = Uploads to a third party NAS
A1 = Triggers alarm Event (NOTE: This option must be checked to have analytics events recorded to the SD card.)
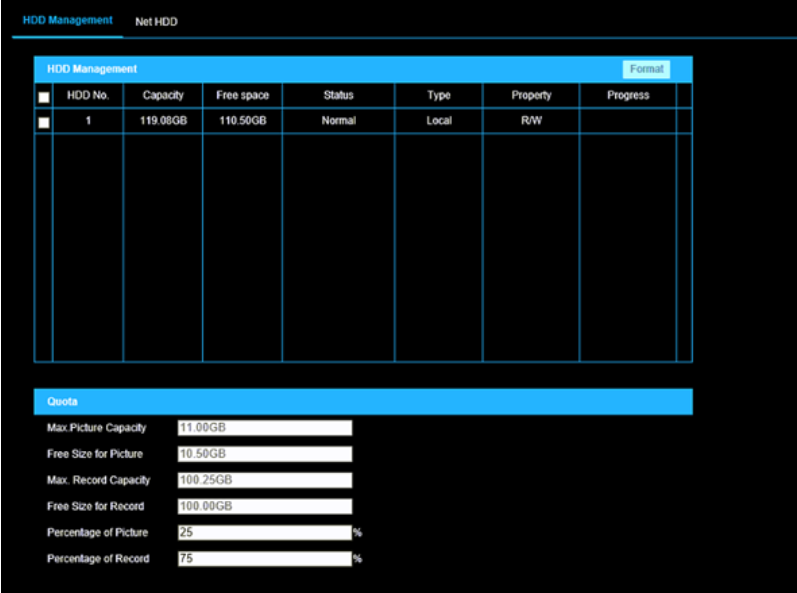
Setup Storage
- Setup Schedule: Enable the recorder schedule because you can create the schedule without enabling it. This will make it look correct at first glance, but it won't record if not Enabled.
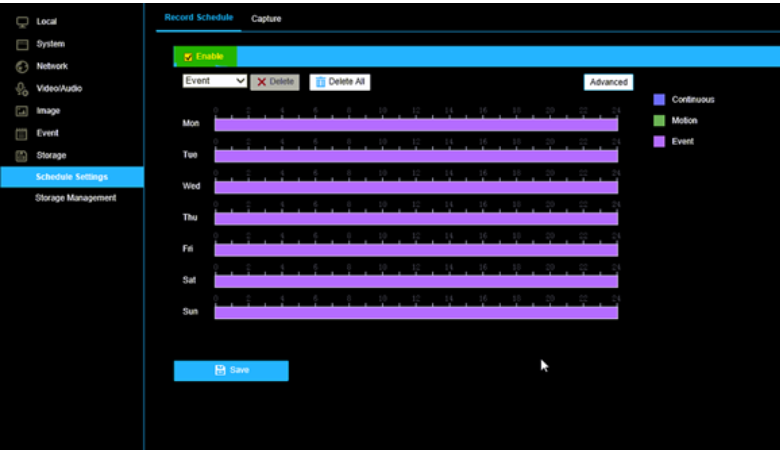
2. Set desired ratio/percentage of SD card storage space that will be dedicated to pictures and video footage. Then Format.
When configured correctly, the Analytics will show up as an alarm event on the timeline almost immediately.


