How Do I Adjust My Camera’s Picture Settings In Proconnect?
Image adjustment settings can be accessed through the Camera Setup menu in your ProConnect NVR. To access the image controls:
- Click on the Setup tab, then the Cameras button.
- In the Cameras list, click on the camera that you would like to adjust.
- To change the Resolution or Frames Per Second of your camera, click on the Live / Recording tab, then the Edit button
- To change the look of the actual video image, click on the Image Settings tab, then the Edit button
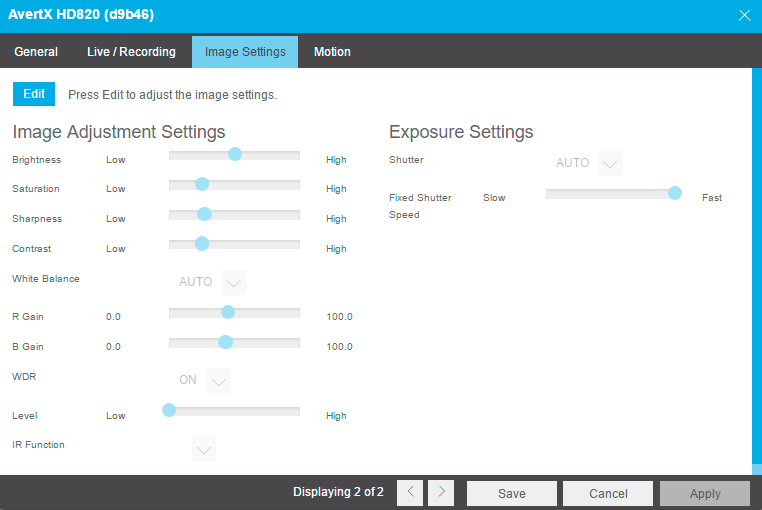
Here are the adjustments available:
Brightness – depth of light and shadow in the image*
Saturation – depth of color in the image*
Sharpness – manage image texture, particularly visible in dark scenes *
Contrast – difference between bright and dark areas of the image*
White Balance – preset colors corresponding to natural or artificial lighting for the most accurate color representation
Wide Dynamic Range – enhances details both in the foreground and background **
IR Function – activate the camera IR (infrared) lights if available, for use with night-time recording
Shutter – designate shutter speed. Longer shutter speed will increase visibility at night, but also result in blurred movement in the frame**
* This option can drastically affect the quality of recorded video. The default value is recommended.
**Using this option results in improved video quality but increases recorded video file size.

