How to Use the AvertX onlineRMA portal
A Return of Merchandise Authorization (RMA) is initiated through the AvertX Tech Support team for in-warranty or out-of-warranty products. An RMA is used for support transactions to refund, repair, replace, or upgrade AvertX products. The AvertX onlineRMA portal helps streamline the RMA process, as shown below:
Once approval has been granted to begin the RMA process, an onlineRMA form is created and an email is sent by the system. Customers use a uniquely assigned RMA link and password to log into the portal. The onlineRMA form must be Finalized, meaning all stages are completed for the specific RMA action to process.
This is an example of what an AvertX onlineRMA portal form may look like: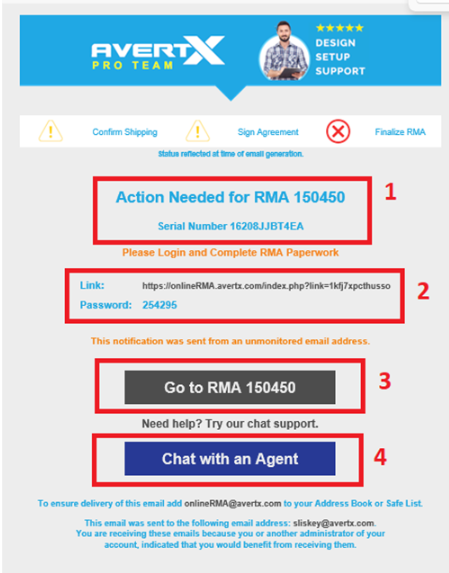
Please note: Information shown in these screenshots is for example purposes and may not reflect what you will see.
- Action Needed: Shows the RMA number as well as the related serial number of the unit for your records and verification purposes
- Link and Password: The link provided that will take you to the respective RMA's portal webpage. The password is needed to log in when prompted.
- Go To RMA: Click on this button to take you to the RMA portal link, instead of copying and pasting from item #2.
- Chat with an Agent: This button will take you to our chat webpage for any clarifications or questions. Simply enter your information when prompted for a tech support agent to assist.
Customer Authorization Action Steps
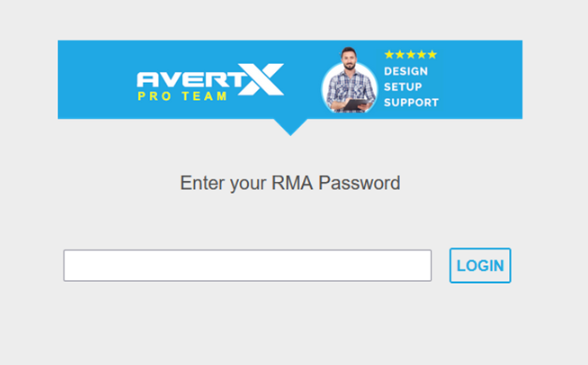
After clicking on the link in the onlineRMA email, select "Go To RMA ######" (or paste the RMA portal link into your web browser's address bar) and you'll be prompted for the login password from block 2 above:
The RMA Instructions page appears:
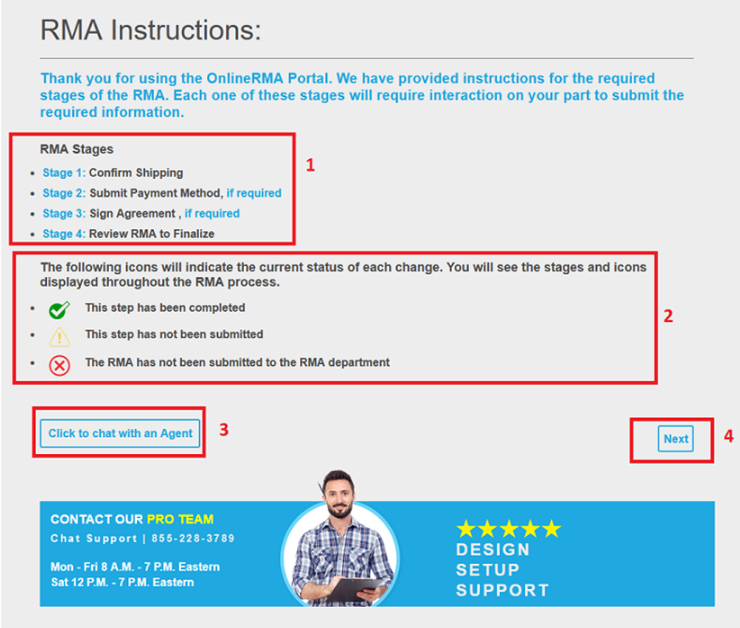
- RMA Stages: Shows the most common stages that need to be completed. "If required” means a stage may not apply to every RMA type. Stages may vary depending on the type of RMA being processed.
- Legend symbols at the top of the onlineRMA portal form page reflect the status of stage completion:
-- GREEN check mark signifies that the step has been completed.
-- YELLOW caution sign signifies that the step has not yet been submitted.
-- RED X signifies that the paperwork is not complete, and the RMA is not progressing. - This button will take you to the AvertX chat webpage for any clarifications or questions.
- The ‘Next’ button continues the RMA process.
Completing the RMA stages: The symbols next to each step of the progress bar will update as you complete them.
1. Confirm that the Product, RMA, Shipping Information and Warranty End Date is accurate: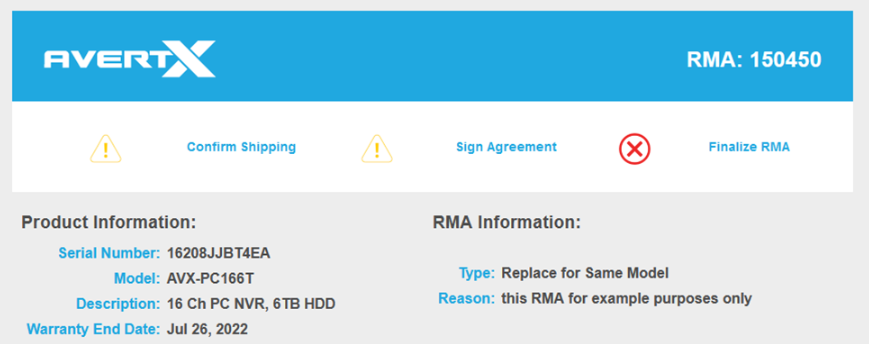
Stage 1: Confirm Shipping
The address reflects what was used when the RMA was created. If the address is correct, select Confirm Shipping as shown below: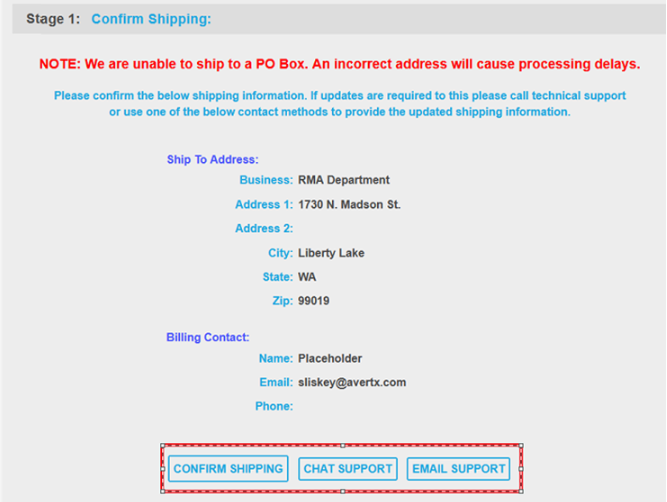
If the address isn't correct, select the preferred Support button.
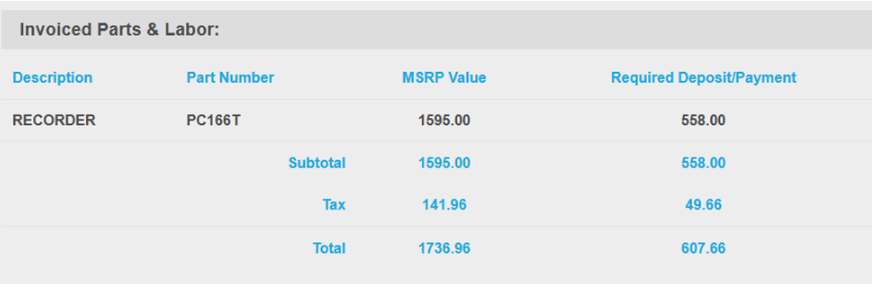
Invoiced Parts & Labor
This section provides an overview of the pricing of the items entered in on your RMA. This pricing may differ depending on the type of RMA being processed.
In this example, the product qualifies for replacement. With replacements, you will see the MSRP Value* of the item and the Required Deposit* in different amounts. A deposit/hold is a percentage of the MSRP and is required on replacement RMA’s.
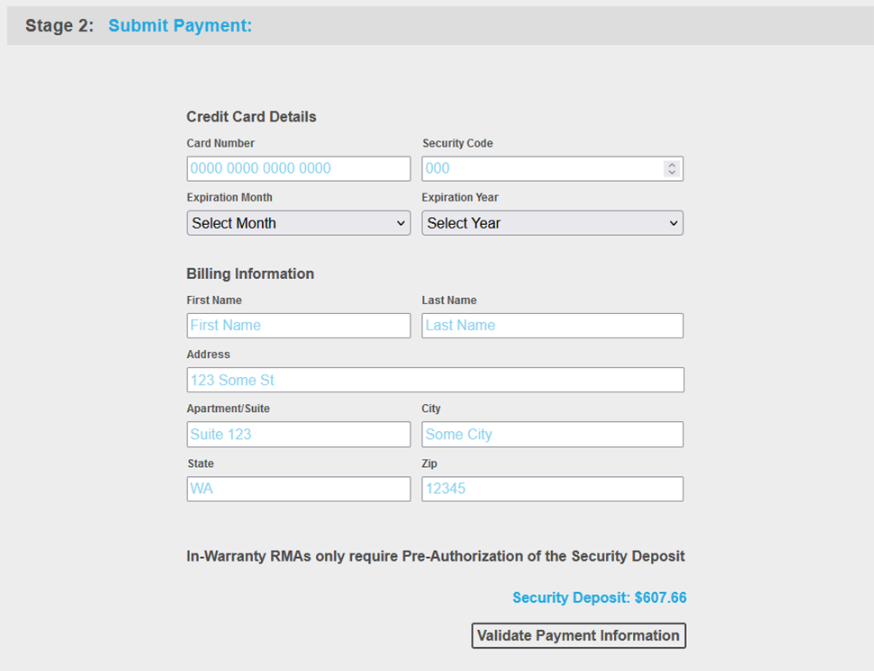
Stage 2: Submit Payment Method
You will need to provide a credit card for the "deposit/hold" or the estimated amount of potential charges. A temporary credit card hold is processed by the AvertX accounting department. Once the replaced unit is returned to AvertX, and evaluated by the RMA department for RMA agreement validation, the deposit/hold is released by the accounting team. The deposit/hold release may take several days after the replaced item is returned.
Validate Payment Information must be selected for the RMA process to proceed.
NOTE: Tech Support agents can communicate with the accounting department, but cannot access or handle credit card information.
Stage 3: Sign the Agreement
RMA agreement terms can be different depending on the RMA type. Our address is listed whenever a product needs to be shipped to the RMA department. Most agreements will look something like this: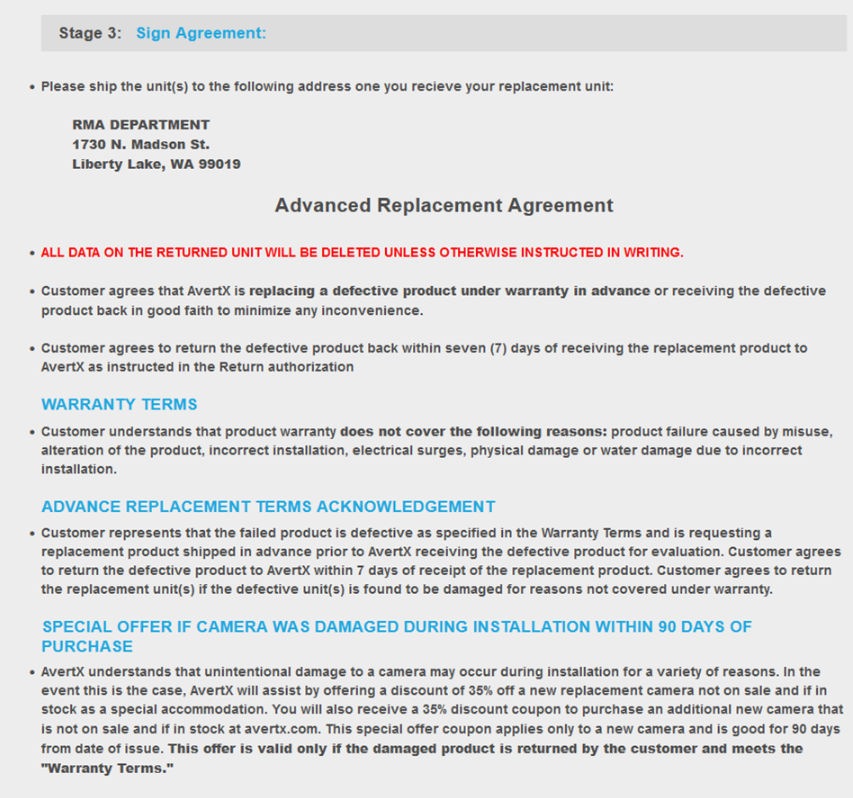
Directly below the agreement, enter your name, agree to the terms, and select the Submit Agreement* button: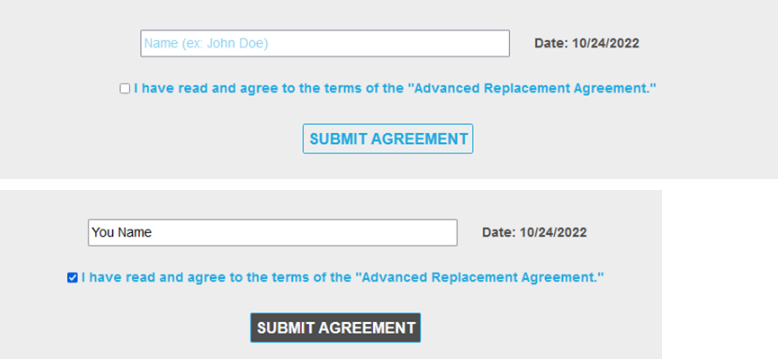
NOTE: Refresh the web browser page to confirm that the onlineRMA portal progress status bar shows a GREEN check mark indicating the stage is completed.
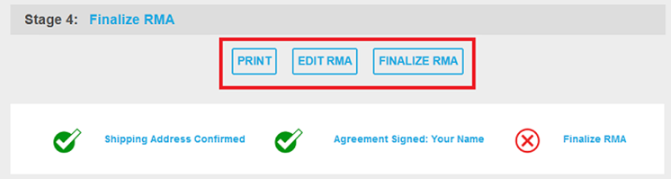
Stage 4: Review and Finalize
Before finalizing, click on the button Next – Review and Finalize the RMA

Review all the RMA information to double-check accuracy. On this page, the progress/status bar appears both at the top and the bottom of the page.
All stages except for "Finalize RMA" should have a GREEN check mark next to them.
Any steps still showing a YELLOW caution symbol won't allow RMA finalization. If this is the case, you can click the Edit RMA button. This will take you back to the previous page so that you can complete the step(s) needed.
You can use the Print button to print a PDF copy if needed.
You must click Finalize RMA.
You will then be re-directed to a page indicating the form has been submitted for processing. Once Finalized, customers will be unable to enter the RMA portal again as the link will become disabled. 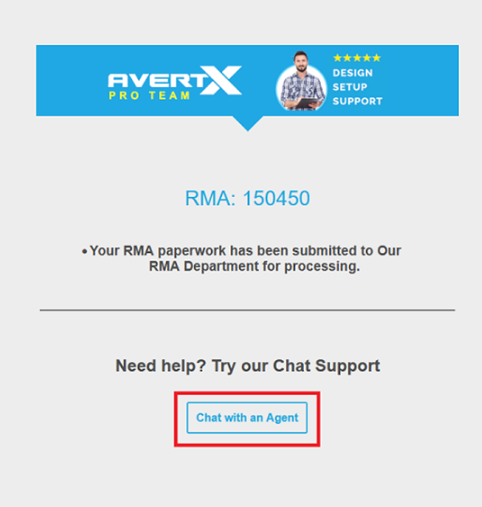
If you believe you have made an error in the form, use the Chat with an Agent button. You may contact the AvertX Tech Support team or use the chat webpage for clarifications or questions. Simply enter your information and include the assigned RMA number.

