How to Setup SD cards for HD438, HD820, HD838, HD828, HD458, and HD848 cameras?
SD cards can be added to various AvertX cameras as back up storage.
To start recording video to the micro SD card in the camera you must first Enable and format the SD card. Formatting SD cards is best done from the camera's administrative user interface; steps vary from camera to camera. Once the SD card is formatted, the video storage must be configured.
The camera's administrative user interface (UI) can be accessed through the Setup > System Settings > Cameras menu via an authenticated account logged into the ProConnect NVR. One can connect directly through the ProConnect NVR's UI console or through AvertX Connect from a computer's web browser.
Access the camera's administrative UI from the ProConnect NVR
- Click on Setup
- Click Cameras to view the list of connected cameras.
- Click on the camera selected for an SD card configuration.
- Click on the IP Address in the upper right hand corner of the General tab. This will open the camera's browser interface in a new tab, it will prompt you for username and password*.
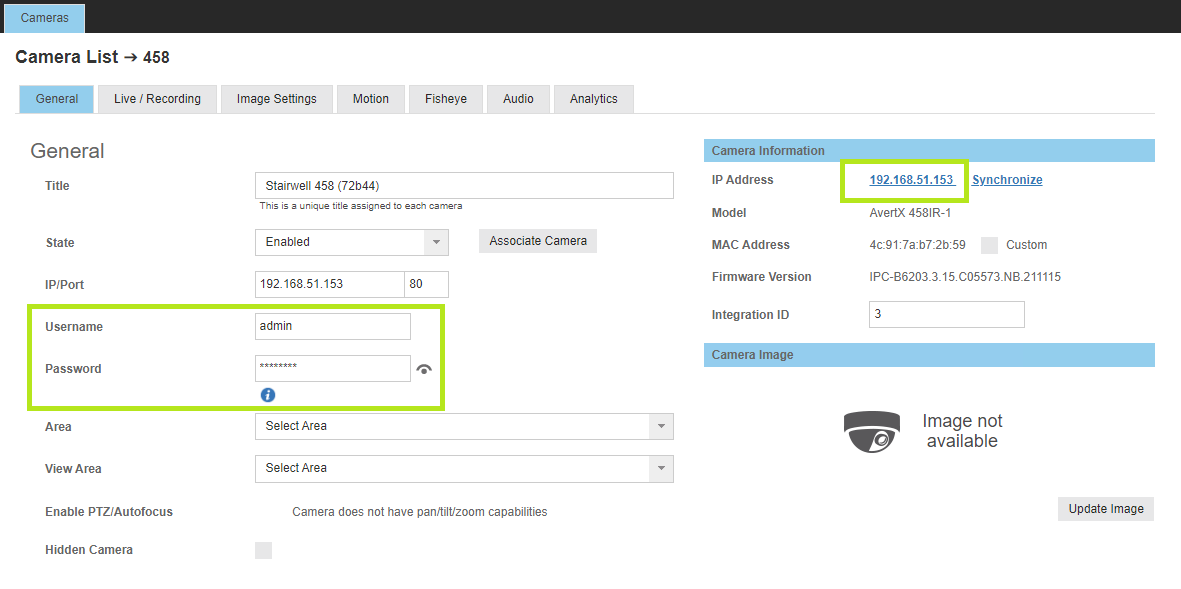
- Log into the camera with username and password.* The default username is " admin" and password is "1234" (without the quotes), or as negotiated with the ProConnect NVR (Setup > System Settings > Settings > Default Camera Password) following a camera hardware reset.
NOTE: *You may be prompted to change the password, and in most cases keeping the default password by clicking Cancel/Off is acceptable/recommended, unless a different password is needed. If the password is changed in the camera's administrative UI, the camera will lose its connection to the NVR until the new camera password is updated in the General tab menu of the camera, steps 1-3 above.
Configuring HD820, HD828, HD458 and HD848 Cameras
Once you are logged into the camera's administrative UI:
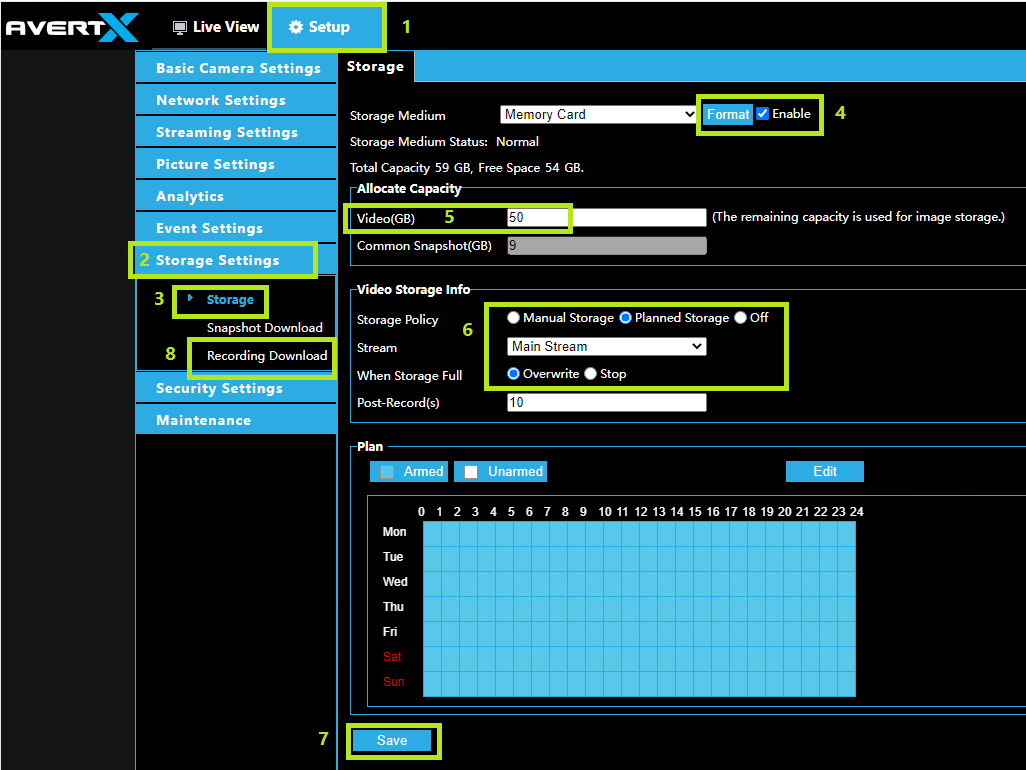
- Click Setup
- Click Storage Settings
- Click on Storage sub-menu
- Click Format button (Enable box must first be checked)
- Under the Allocate Capacity section, enter the amount of space you wish to use for recorded video or snapshots. If you only wish to store video on the SD card, then enter the same number shown above next to Total Capacity in the Video(GB or MB) field.
- Configure the Video Storage Info
-- Set Storage Policy to Manual storage (recommended) or specify times under Planned Storage
-- Set Stream to Main stream (High bandwidth resolution) or Sub stream (Low bandwidth)
-- Set the When storage Full option to Overwrite - Click Save
- Click on Recording Download to search and download footage recorded on the SD card.
Play/view video recorded on the SD card
The example below shows video periods recorded to an SD card in the Recording Download menu:
1. Click the time icon next to the date for the desired timeframe, and then click OK
2. Click on Search for the selected timeframe (if footage is available)
3. Check on the circle left of the desired numbered period and click on Download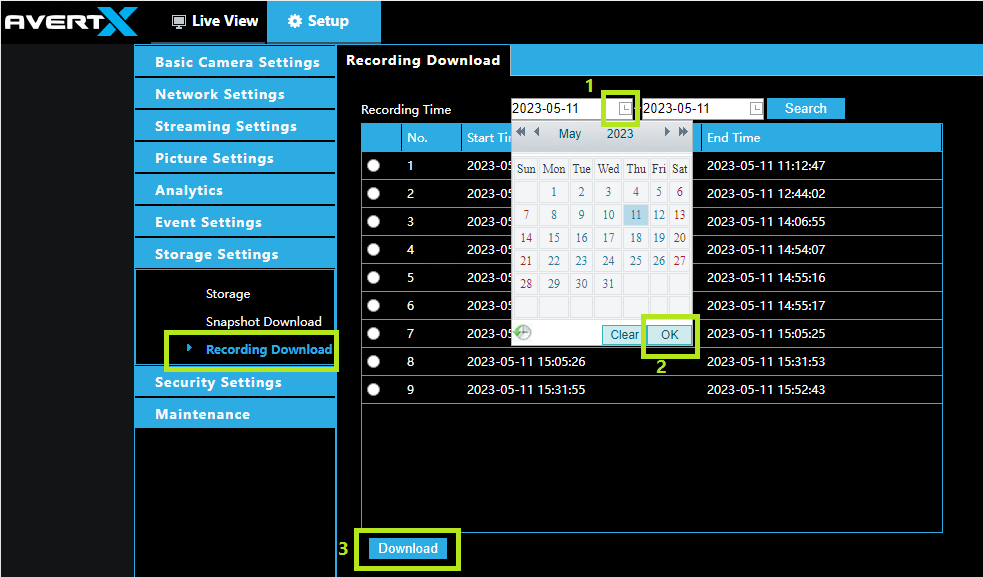
4. The file will be saved to the location the web browser is configured for downloads.
5. Using a computer file manager, find the selected video file.
6. Play the downloaded video using your preferred multimedia video player.
Configuring HD838 and HD438 Cameras
Once you are logged into the camera's administrative UI:
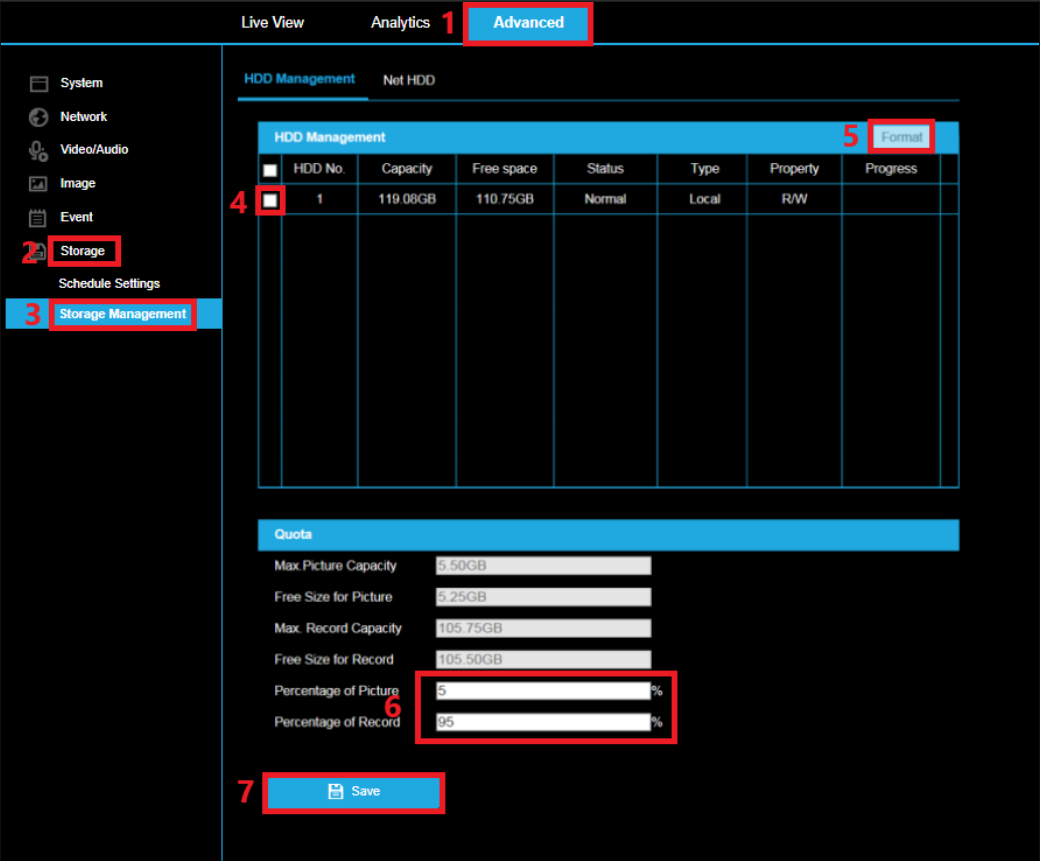
- Click Advanced at the top
- Click Storage on the left
- Click Storage Management
- Place a check next to the SD card in the table.
- Set percentages for video / picture record space. If you are only recording video to the SD card, then set percentage of record to 100%.
- Click the Format button in the upper right. After formatting status should change to Normal
- Click Save.
Now that the micro SD card has been formatted video can be recorded to it based on the recording schedule settings. The example below shows daily continuous recording:
- Click Schedule Settings
- Make sure the drop down menu is set to Continuous
- Click on the time bar and drag the mouse to select the time period. Note: Click on the selected time period to adjust the time period to the desired time by either moving the time bar or input the exact time period.
- Repeat step 3 for the remaining days of the week or you can hover you mouse to the right of the time bar and click the green copy button and apply the same time selection to the remaining days.

- Now check the Enable box at the top
- Click Save.

