How Do I Connect Directly to a ProConnect Recorder Over AvertX Connect?
We recommend using the AvertX Connect versus a Direct Connect. However, setting up a Direct Connection to your recorder over AvertX Connect can be helpful in certain situations.
The following will be needed.
- Port forwarding rules set up on the network (i.e. router) for the HTTP and HTTPS ports on the NVR.
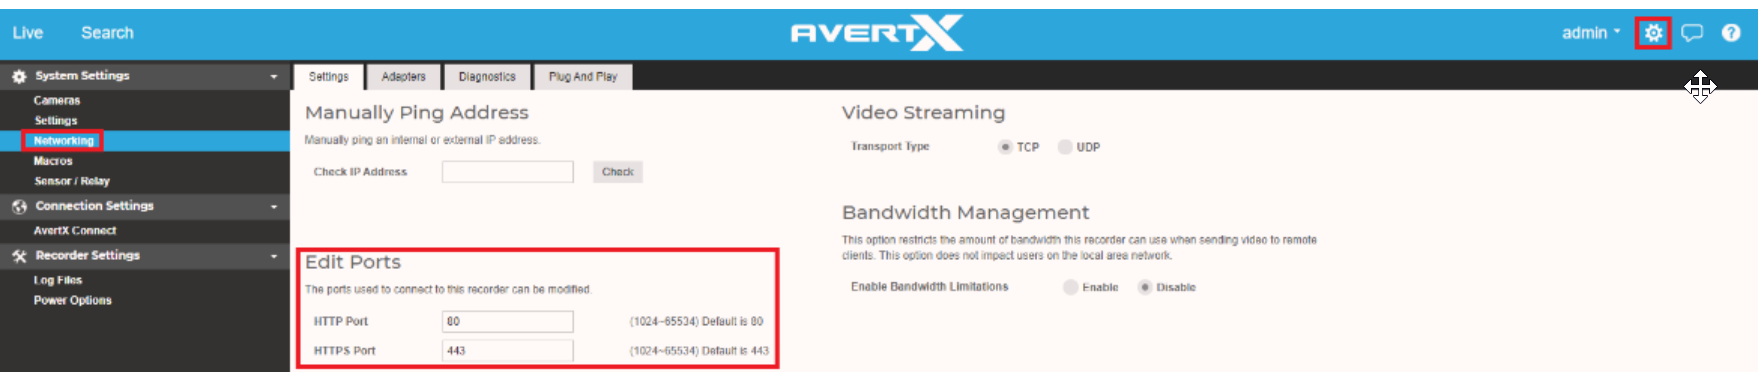
- From the ProConnect NVR user interface, go to System Setup > Setup > Networking > Settings to find the ports the NVR is on. By default, port 80 (HTTP) and port 443 (HTTPS) are used.
- Obtain the external IP address of the router or the DDNS URL. A DDNS URL would need to be independently sourced. You could also discover the external IP address of your network by visiting sites like whatismyip.com or ipchicken.com.
Note: External IP addresses are provided by your Internet Service Provider (ISP) and they could change it regularly. - Add the Direct Connect information (external IP address or the DDNS address) to your AvertX Connect account.
- Log into AvertX Connect and navigate to the Management > Recorders tab.
- Click on the Recorder Name or the EDIT button of the recorder that will have a direct connection.
- Click on the Remote Network Settings menu option
- Check mark the Direct Connect option, and enter the IP address and web port that will be used:

- Click on the Save button at the bottom.

