How do I optimize Motion Detection on ProConnect?
To set up the motion settings on the cameras, you can follow the following steps:
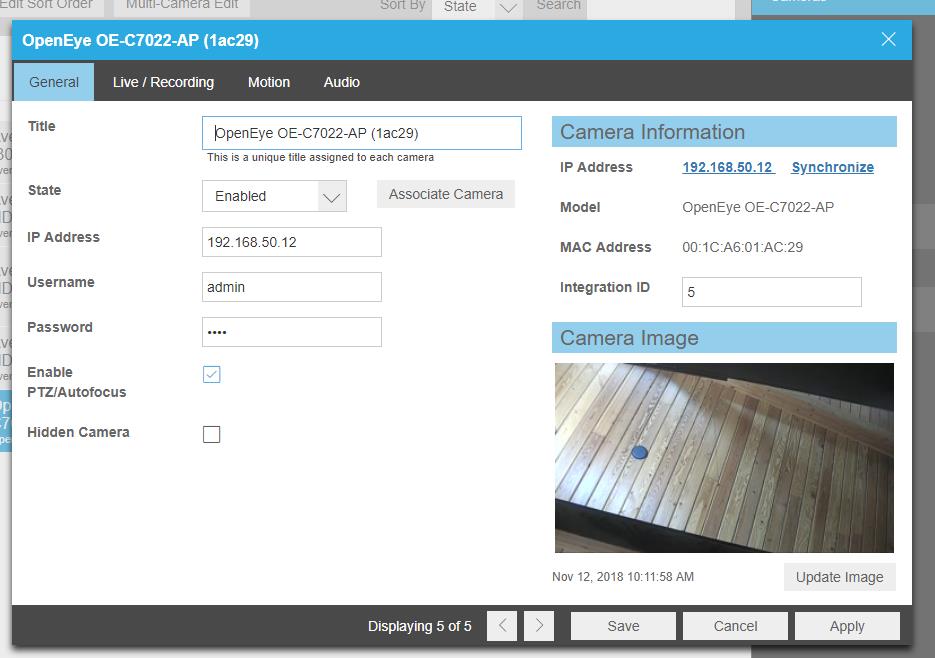
- Click on the Setup tab on the top navigation bar:
- You should automatically be put into the Cameras menu by default. click on the camera that you wish to set the motion settings on which will bring up the camera settings for the camera:
- Now click on the Motion tab at the top of the screen:
- You will see two options on the left hand side, Motion and Noise sensitivity.
Motion Sensitivity
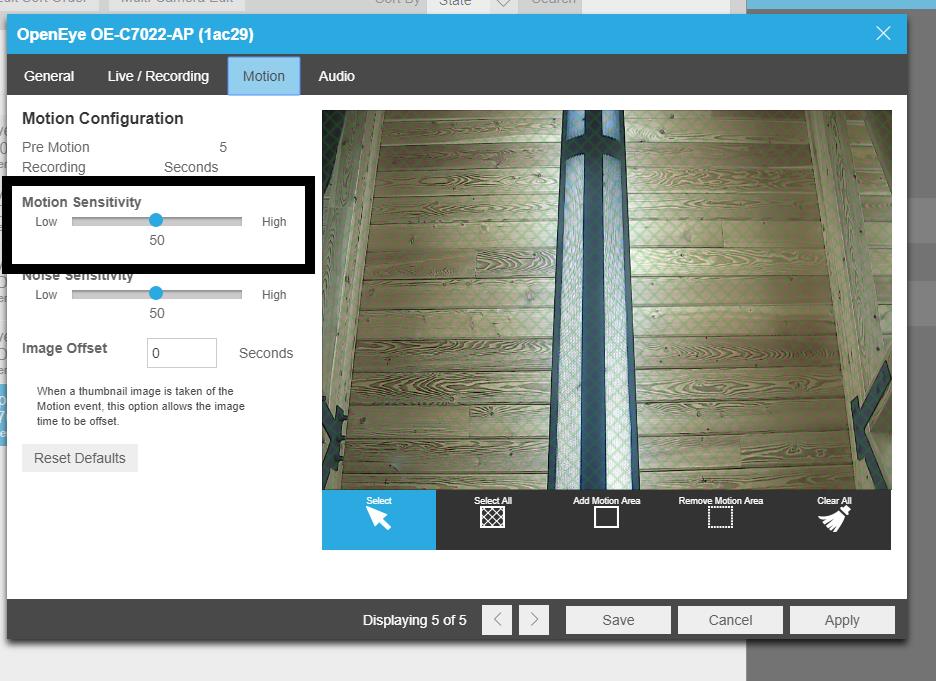
- To explain motion sensitivity, it is useful to imagine the image is split into a grid. The squares of the grid make up the entire image.
- Setting motion sensitivity to a higher number will make the amount of detection area smaller so that it will detect more motion. So, each of those squares will be made smaller so that the system will detect smaller bits of motion since each area is smaller.
- Setting this option to a lower number will make the amount of detection area larger so that it will detect less motion. The movement in the image will need to be larger to be considered motion.
- You would want to set Motion Sensitivity to a higher number if you want to detect smaller bits of motion. For example, if the camera overlooks a parking lot, higher sensitivity would detect cars moving in the distance.
- You would want to set Motion Sensitivity to a lower number if you have an area that has a lot of small bits of constant motion and you want to detect larger areas of motion. For example, if you have an area with a lot of trees or bushes, lower sensitivity would ignore the constant motion of the trees and bushes while detecting a person or car.
Noise Sensitivity
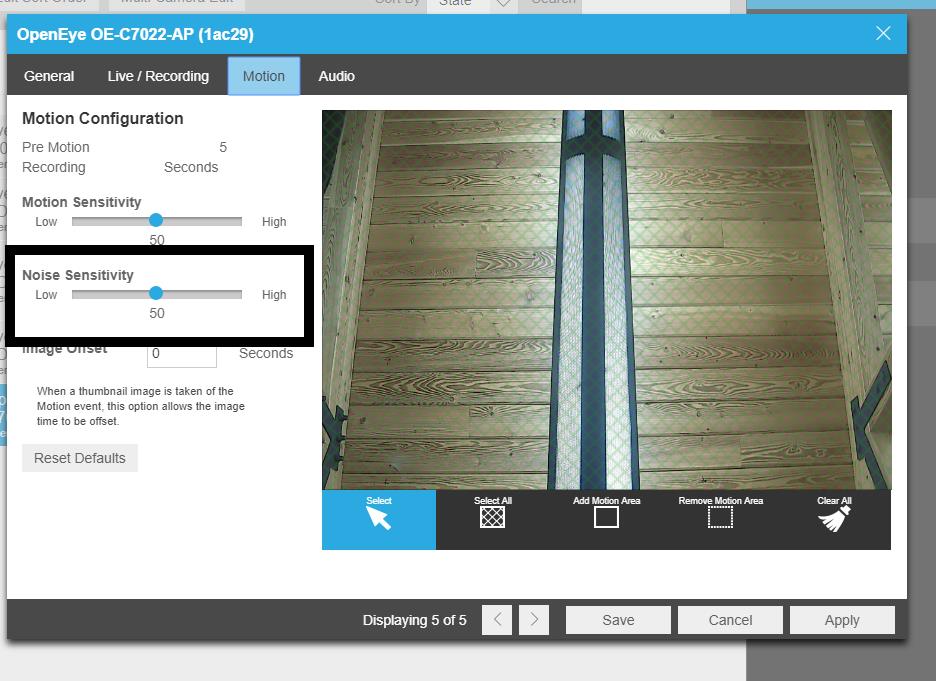
- This is overall sensitivity to the full image.
- Setting this number to a higher number will make the entire image more sensitive to motion
- Setting this number to a lower number will make the entire image less sensitive to motion
- For example, if you have a large area with a lot of trees or grass and you set this option to a larger amount, there will be much more motion being detected
- If you want the entire area of an image to be less sensitive to motion, then set this option to a lower amount
- If you have an area that has a lot of noise, such as snow or other weather-related anomaly, you might want try setting the Noise Sensitivity number to a lower amount.
Image Offset
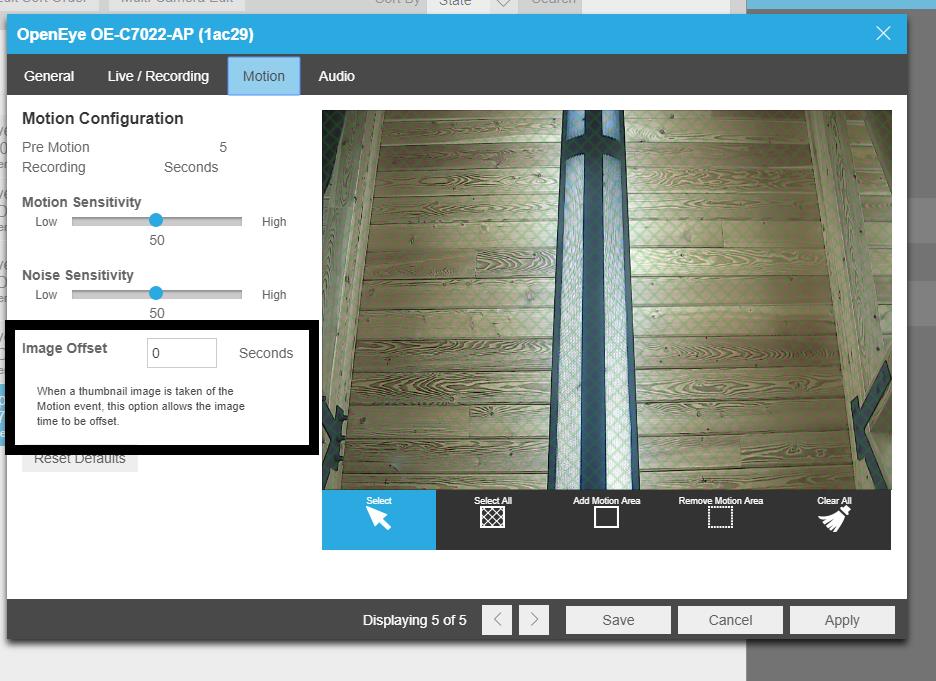
Image Offset is the amount of time that the NVR will wait after it detects motion before it will take a snapshot preview of the screen. Then when you look at the events, it will present you with a thumbnail of the image that is taken as per the Offset in seconds. That way you will see a thumbnail with the motion already in progress.
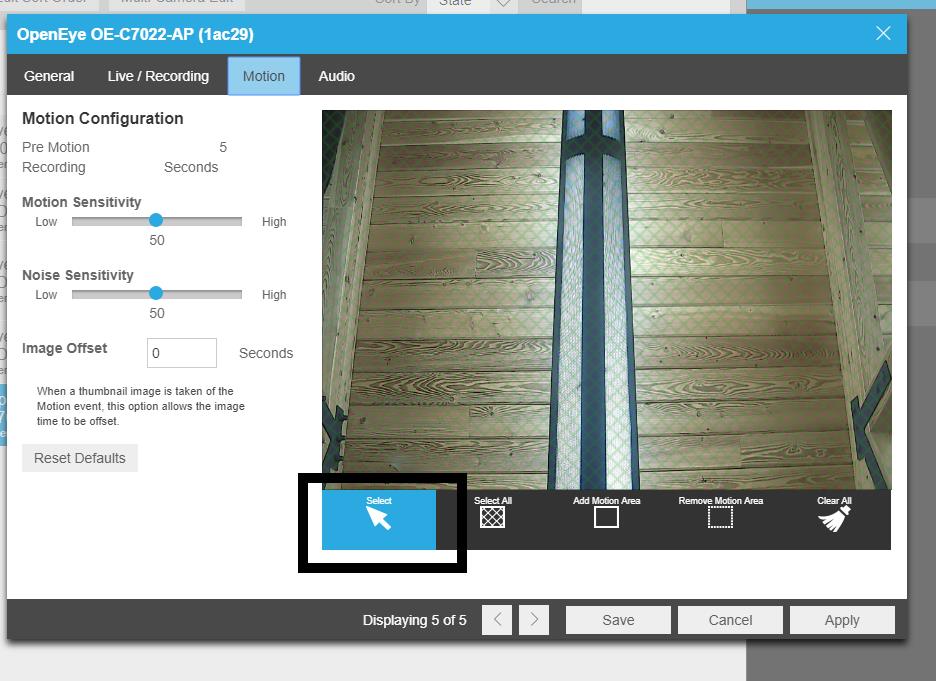
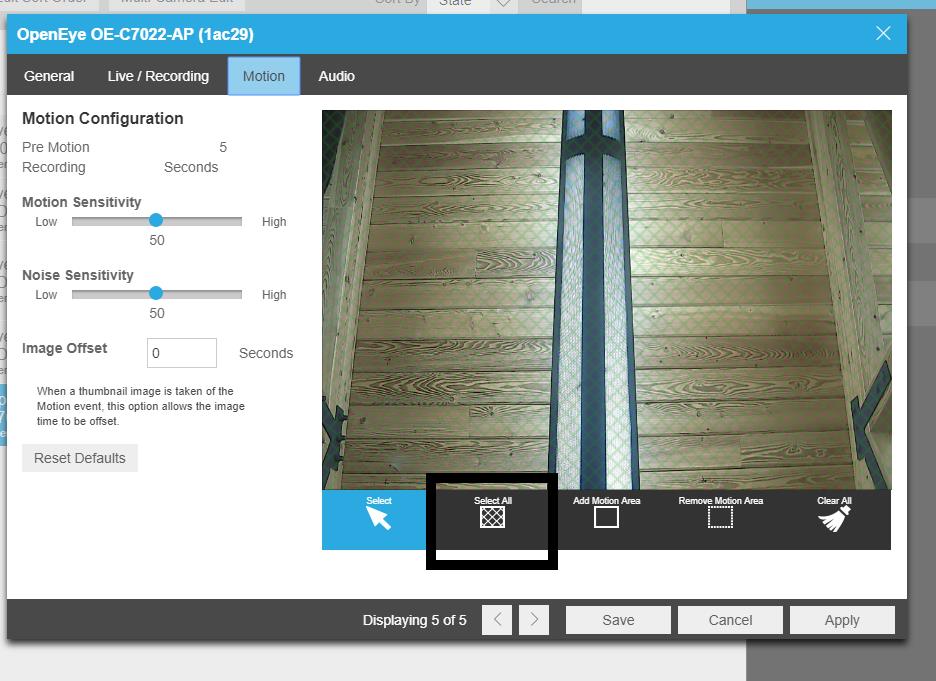
Motion Areas
Setting up motion areas in the image, you will want to make custom motion grids when there are areas of motion that you specifically wish to exclude such as a busy street or sidewalk that will create a lot of false positive events.
- The Select option allows you to grab and move individual grids or boxes within the image area. You would select the tool, then you can click on a grid or empty box and drag it around. Then click Apply to continue on to the next step:
- Select All allows you to select the entire image to start over with a full motion detection grid in place. This is helpful if you just want an easy way start over with a full motion grid on the whole image:
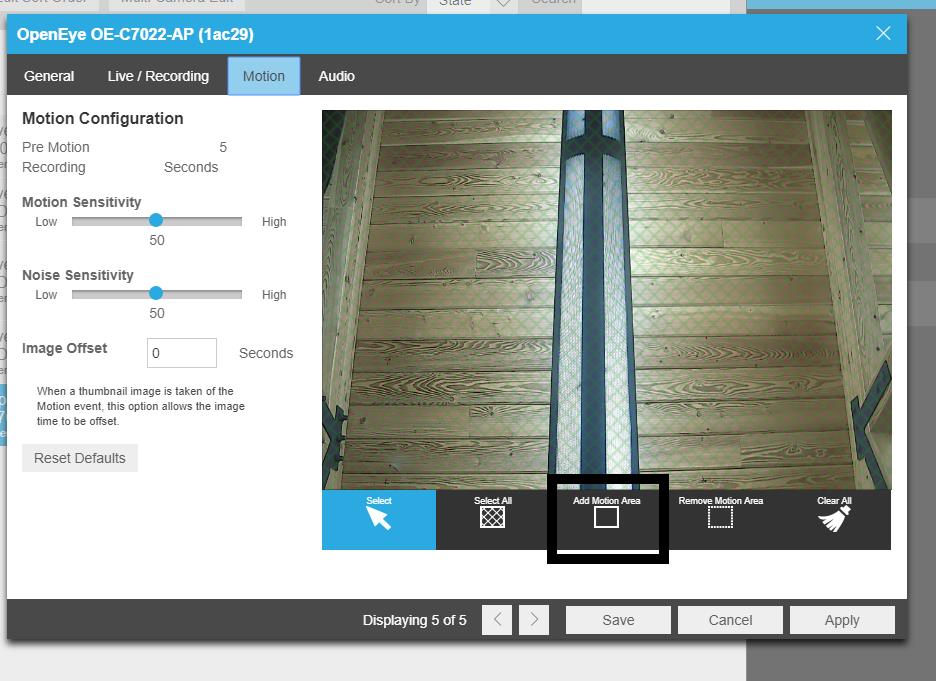
- Add Motion Area will add a motion area where you want. You can create motion grids by selecting the Add Motion Area button and then clicking and dragging the cursor to create a rectangular shaped area. You can add multiple areas:
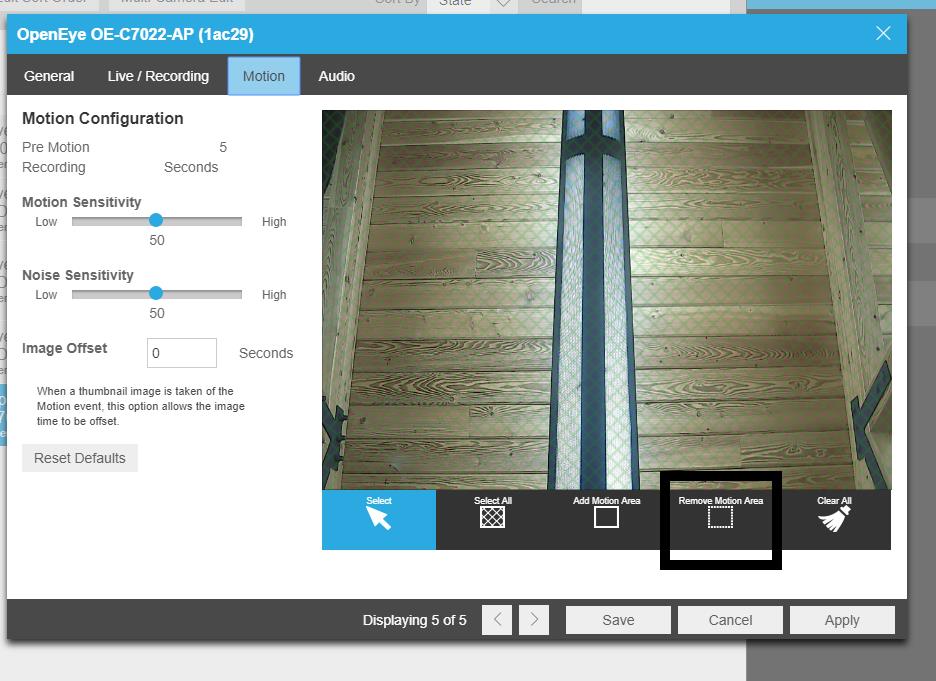
- Remove Motion Area will allow you to remove motion areas. You can create empty grids that will specifically ignore motion detection by selecting the Remove Motion Area button and dragging the cursor to create a rectangular shaped area. You can add multiple areas. This is highly recommended for areas where constant motion is occurring like a busy street or busy sidewalk.
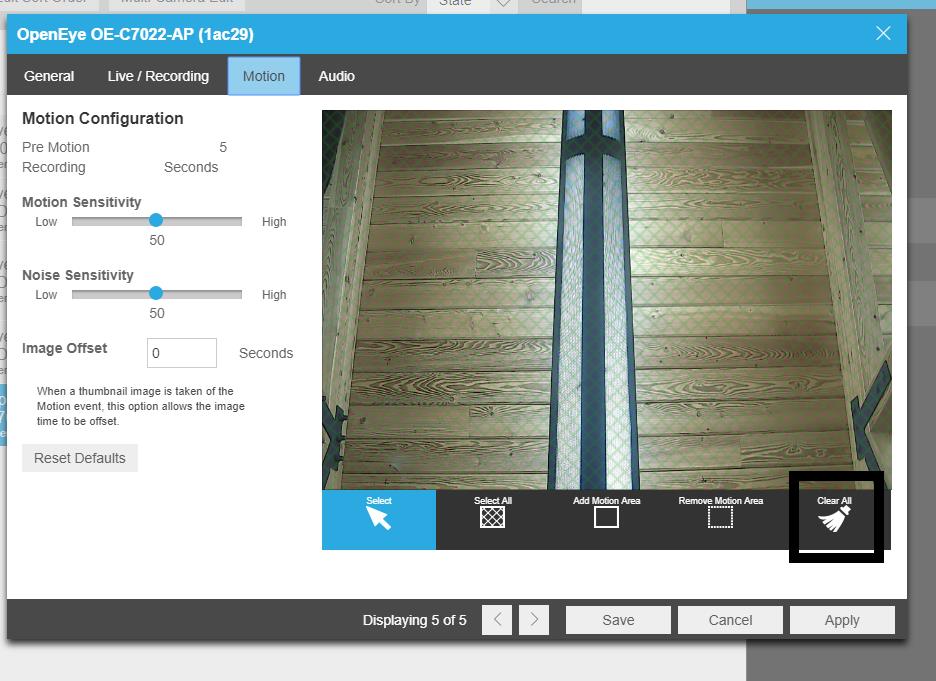
- Clear All is the opposite of the Select All option. This allows you to clear the entire motion grid in the image so that you can then add new motion areas. This is helpful if you want to easily add a small area of motion and ignore the majority of the image, you would click Clear All to start with an empty image and then click on the Add Motion Area button to add motion areas.
Pre Motion
Pre Motion cannot be changed. This lets you know that when it detects motion, the system will start recording the high stream/high quality 5 seconds before the actual motion event occurs.

